Windows 11 offers a modern interface, powerful features, enhanced security, and improved productivity tools. However, over time, even a capable PC can begin to feel slow, experience longer startup times, consume excessive system resources, or struggle to deliver consistent performance. Unnecessary background applications, startup programs, outdated drivers, accumulated temporary files, and poorly configured system settings can all contribute to these issues. Whether you’re using a budget laptop, a high-performance desktop, or a gaming PC, these tips will help you through practical ways to fine-tune Windows 11 to suit your needs.
From optimizing startup behaviour and managing background processes to cleaning up storage, adjusting visual effects, improving gaming performance, and configuring advanced system settings, you’ll discover techniques that can help make your PC feel faster and more responsive.
Find out what is slowing your PC down
Press Ctrl + Shift + Esc to open Task Manager. Under Processes, sort by CPU, Memory, or Disk while the slowdown is happening. Under Performance, check how heavily each resource is being used.
- High CPU usage: Identify the application doing the work. Updates, antivirus scans, video processing, and browser tabs can temporarily consume substantial CPU time.
- High memory usage: Look for large applications, many browser tabs, or usage that keeps climbing during a session.
- High disk activity: Updates, synchronization, indexing, or insufficient memory may be responsible. A mechanical system drive is also a common bottleneck.
- Low utilization but poor responsiveness: Investigate power settings, heat, storage health, drivers, or a slow network connection.
Do not end an unfamiliar Windows process simply because it is busy. Identify it first, and check whether the activity settles after background maintenance finishes.
Record a repeatable test
Choose something you notice: time from sign-in to a usable desktop, opening a large project, or frame-rate consistency in one game. Test under similar conditions, with the same power connection and applications open. Change one category at a time.
For intermittent problems, search Start for View reliability history. Reliability Monitor can help connect crashes or failures with recent updates and installations.
Create a recovery plan
Back up important files before changing drivers, firmware, partitions, or encryption settings. A restore point can help reverse some system changes, but it is not a file backup.
If Device Encryption or BitLocker is enabled, confirm that you can access the recovery key before firmware or security-related changes. Keep it somewhere accessible without relying on the encrypted computer itself.
Keep Windows Healthy Before Tuning It
Install updates
Open Settings > Windows Update, install available updates, and restart when requested. A pending update can leave installation work competing with your applications.
Set active hours to reduce inconvenient restarts. For an important presentation or deadline, a short update pause can be sensible; permanently disabling updates is not a performance strategy.
After a major update, allow background maintenance to settle before benchmarking. Otherwise, you may be measuring update cleanup rather than normal performance.
Use appropriate drivers
Use Windows Update and your PC manufacturer’s support site for system drivers. For gaming or professional graphics work, the GPU manufacturer’s official driver may be appropriate. Laptop-specific drivers can matter for power management, graphics switching, and custom hardware.
A newer driver is not automatically faster or more stable. If a problem began immediately after an update, rolling back the affected driver may be more useful than updating everything.
Avoid third-party “driver boosters.” They can install unsuitable packages or add software you do not need.
Keep security protections enabled
Check Windows Security for unresolved warnings. Use a reputable antivirus, but avoid multiple real-time antivirus products competing over the same files.
Leave Microsoft Defender, the firewall, Secure Boot, and supported hardware protections enabled unless you have a specific, documented reason to change them. Disabling security to improve a benchmark creates a poor everyday trade-off.
Reduce Startup Load
Disable startup applications
Open Settings > Apps > Startup or Task Manager’s Startup apps section. Disable applications that do not need to launch every time you sign in.
Common candidates include chat clients, game launchers, media utilities, and vendor promotional tools. Keep applications you depend on immediately, such as accessibility software, essential peripheral utilities, or your password manager.
Disabling startup does not uninstall an application; you can still launch it manually. Startup impact is a useful clue, not a complete verdict. Test whether the desktop becomes usable sooner.
Uninstall applications you do not use
Review Settings > Apps > Installed apps. Remove unused trials, redundant utilities, old launchers, and software bundled with your computer that serves no purpose for you.
If Copilot or another optional application appears with an uninstall option and you do not use it, you can remove it. Removing an app does not necessarily remove similarly named features elsewhere in Windows or Microsoft services.
Do not remove unfamiliar runtime packages, hardware components, or shared frameworks without checking their purpose. Another application may depend on them.
Control background activity
For supported applications, open their advanced options in Installed apps and adjust Background apps permissions. This control is not available for every application; traditional desktop programs often manage background behavior through their own settings.
Pause cloud synchronization during a demanding task if it is causing contention. Disable unnecessary launch-on-startup, tray, or automatic-download options inside individual applications.
Avoid blanket service-disabling guides. Services that look idle may support printing, networking, updates, authentication, or recovery when needed.
Optimize Storage and Memory
Open Settings > System > Storage to identify large categories. Review Temporary files and Cleanup recommendations, then remove items you understand.
Check every selection before confirming. Downloads may contain personal files, while removing a previous Windows installation can eliminate an available rollback option.
Configure Storage Sense rather than accepting every cleanup policy. Review its Recycle Bin, Downloads, and cloud-content settings. Making a cloud file online-only frees local space, but you will need connectivity to download it again.
Leave enough free space for updates, temporary work, and your largest projects. There is no single ideal percentage for every drive and workload.
Let Windows maintain SSDs correctly
Search for Defragment and Optimize Drives and check that scheduled optimization is enabled. Windows applies maintenance appropriate to the drive type, including SSD optimization such as retrim.
Do not repeatedly force traditional defragmentation on an SSD or install an SSD “speed booster.” If your system still runs from a mechanical hard drive, moving Windows and frequently used applications to an SSD usually matters far more than cosmetic tweaks.
Back up immediately if storage errors or unusual drive behavior appear. Optimization is not a remedy for failing hardware.
Keep the page file and narrow indexing sensibly
Leave virtual memory system managed unless a specific application or troubleshooting requirement justifies changing it. Disabling the page file can cause allocation failures or crashes, even when the computer has substantial RAM.
If memory pressure is persistent during your normal workload, close unnecessary applications or consider a RAM upgrade where supported. Check compatibility and upgradeability before buying.
For search indexing, look under Settings > Privacy & security > Searching Windows. Exclude large folders you never search, such as build outputs or bulky archives. Turning indexing off entirely can make searches slower and less useful. Some applications, including certain Outlook configurations, also rely on Windows Search.
Balance Power and Graphics Performance
Choose a power mode for the task
Open Settings > System > Power & battery, or the equivalent power page on your device. Balanced is a good everyday starting point. Test Best performance for demanding work while plugged in.
A performance mode can increase heat, fan noise, and battery consumption without helping a task that is limited by memory, storage, or the network. On a thin laptop, extra heat may also reduce sustained performance.
Use energy-saving options for battery life rather than treating maximum performance as a universal setting.
Fix thermal limitations and visual distractions
Use laptops on a firm surface, keep vents unobstructed, and clean dust according to the manufacturer’s instructions. If performance drops after several minutes of load, investigate cooling rather than immediately changing Windows services.
For a more immediate-feeling interface, open Settings > Accessibility > Visual effects and test disabling animation or transparency effects. This can improve perceived responsiveness, but it does not significantly accelerate a demanding application.
Avoid unofficial firmware modifications or voltage settings unless you understand the stability and warranty implications.
Tune games and graphics applications
Under Settings > System > Display > Graphics, assign demanding applications to the appropriate GPU when your PC offers multiple options. A high-performance GPU can improve speed while increasing power use.
Keep Game Mode enabled as a reasonable starting point. Disable unused overlays and background recording through their respective settings.
Features such as hardware-accelerated GPU scheduling depend on hardware, drivers, and workload. Test them rather than assuming they always help. Evaluate frame-time consistency and stutter, not just average frame rate. Do not casually disable Memory Integrity or other security features for small potential gains.
Reduce Windows Data Collection
Understand required and optional diagnostic data
Open Settings > Privacy & security > Diagnostics & feedback. Turn off Send optional diagnostic data if you do not want to share additional usage and diagnostic information.
Also review personalized offers or similarly named diagnostic-data personalization controls, plus optional inking and typing improvements where available. Set feedback frequency to a less intrusive option if the control is offered.
Ordinary Windows Home and Pro settings do not provide a supported switch that stops all Microsoft communication. Update checks, security services, account features, and required diagnostic data have separate purposes and controls.
If you use the diagnostic-data deletion option, understand its scope: it is not a universal erasure request for every Microsoft service or account record.
Limit advertising and suggested content
Review Privacy & security > General, or the equivalent recommendations and offers page on your build. Disable options you do not want, such as advertising-ID use, suggested content, and app-launch tracking used for personalization.
Then check Personalization > Start for recommendation controls. Under System > Notifications, review additional settings for tips, suggestions, and prompts to finish setting up the device.
These changes reduce personalization and interruptions. They do not remove advertisements from every website or prevent third-party applications from collecting data under their own policies.
Review search and online integrations
Check Windows search settings for cloud-content search, local search history, and search highlights. Disable integrations you do not need, particularly on a shared computer.
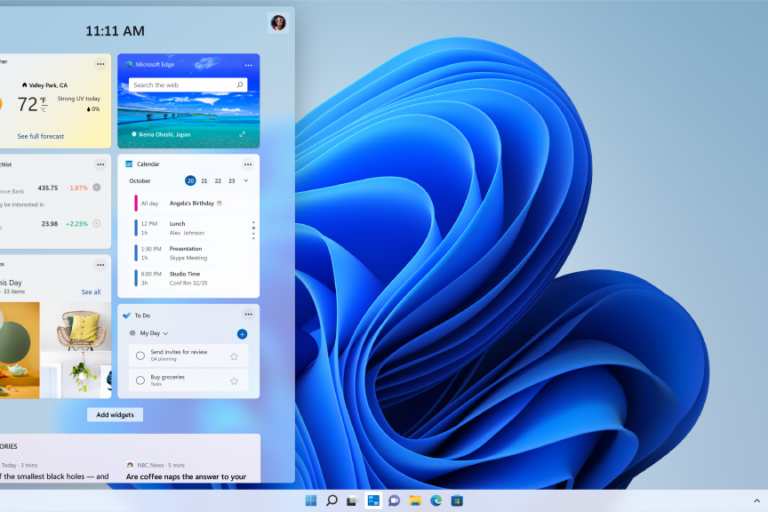
Turn off or remove Widgets if you do not use them. Hiding a taskbar button is primarily an interface change, not proof that all related online activity has stopped.
Avoid aggressive domain-blocking lists or tools promising “zero telemetry.” Broad blocking can disrupt updates, sign-in, licensing, or security services, and maintaining such lists requires ongoing troubleshooting.
Control Permissions, Accounts, and Cloud Storage
Audit location, camera, and microphone access
Under Settings > Privacy & security, review Location, Camera, Microphone, and other relevant application permissions. Grant access only where a feature requires it.
Check both application-specific controls and any separate desktop-app controls. Traditional desktop applications do not always receive the same granular restrictions as supported packaged apps.
Recent activity can help identify unexpected access where Windows provides it. Also review permissions inside your browser: a website’s microphone permission is distinct from Windows allowing the browser to use the microphone.
If you disable location entirely, consider the effect on maps and location-dependent recovery features. Privacy settings work best when chosen deliberately, not indiscriminately.
Choose an account model and secure it
A Microsoft account supports synchronization, account recovery, and services such as OneDrive. A local account reduces some account-linked integration, but it does not stop Windows diagnostic traffic or make the device anonymous.
Where supported, an existing personal installation can offer Accounts > Your info > Sign in with a local account instead. Initial setup requirements vary by edition and release. Work-managed devices may have organization-enforced restrictions.
Use Windows Hello, protect online accounts with multifactor authentication or passkeys, and enable Device Encryption or BitLocker where supported. Encryption protects stored data if the device is lost; it does not prevent signed-in applications from accessing authorized files.
Decide what should synchronize
Review Settings > Accounts > Windows backup and OneDrive’s Sync and backup settings. Decide whether Desktop, Documents, Pictures, preferences, and other supported items should synchronize.
Before stopping folder backup or unlinking OneDrive, confirm where the files actually reside and whether they are fully downloaded. Do not assume cloud placeholders are complete local copies.
Synchronization is useful, but it is not an independent backup: unwanted changes or deletions can propagate. Keep a separate backup of important files, and test that you can restore them.
Optimize Browsing and Network Use
Reduce browser overhead
Remove unused extensions, limit unnecessary tabs, and enable sleeping-tab or memory-saving features where available. Review whether your browser continues running background applications after you close its windows.
Use efficiency settings according to your workload. Aggressive saving modes may delay background tabs or affect web applications that need to remain active.
Keep browser updates and phishing protection enabled. Clearing all browsing data repeatedly is not a reliable speed fix; it can remove useful sessions and force sites to download cached resources again.
Separate privacy controls from anonymity
Review browser tracking protection, third-party-cookie settings, site permissions, and account synchronization. Stricter controls can improve privacy but may break sign-in or embedded content on some sites.
Private browsing primarily limits what remains in the local browser session. It does not hide activity from websites, your employer’s network, or your internet provider.
DNS over HTTPS can encrypt DNS queries to a supported resolver. It does not encrypt every aspect of a connection or provide anonymity. A VPN changes who can observe parts of your traffic; it shifts trust to the VPN provider rather than eliminating trust.
Diagnose connectivity before changing network settings
Compare Wi-Fi with Ethernet if possible, test another device, and distinguish slow downloads from slow local application performance. Router placement, signal quality, congestion, and the remote service often matter more than Windows tweaks.
Under Windows Update’s advanced options, review Delivery Optimization. You can restrict downloads from other PCs or adjust bandwidth controls where available.
Metered connections can limit some background transfers, but they do not make the connection faster and may delay useful downloads. Avoid unexplained registry-based “network accelerators.”
Use a short maintenance routine
Recheck startup applications after installing major software. Periodically review free space, permissions, backups, and update status. Repeat your original performance test after meaningful changes.
Keep a simple record of unusual settings you change. When a problem appears later, that record is more useful than trying another batch of tweaks.
Reserve advanced tools for specific problems
Experienced users can use Microsoft Sysinternals Autoruns to investigate additional startup entries, Process Explorer to examine processes, or Windows Performance Recorder for detailed tracing.
Use these tools to answer a defined question. Before disabling an entry, establish what it does and how to restore it. Avoid applying registry files, scheduled-task changes, or PowerShell scripts whose individual actions you cannot explain.
Registry cleaners, RAM cleaners, disabled page files, and blanket security removal are poor substitutes for diagnosis. If storage or memory consistently limits your normal workload, a compatible SSD or RAM upgrade may outperform every software tweak combined. The goal is a computer that is faster, quieter, more private, and still dependable—not one with the largest number of disabled features.