Self-hosting means running services on hardware you control instead of relying entirely on a provider’s servers. A home server can store documents, back up computers, organize photos, stream movies, and synchronize files. You decide where the data lives, who can access it, and when the software changes.
The trade-off is responsibility. You become the person who replaces failed disks, installs security updates, checks backups, and restores service after a mistake. The best setup is not the most elaborate one, it is the smallest system that meets your needs and that you can reliably maintain.
Separate storage, applications, and access
A useful way to understand a server is to divide it into three layers:
- Storage: the disks and filesystems holding your files, application data, and backups.
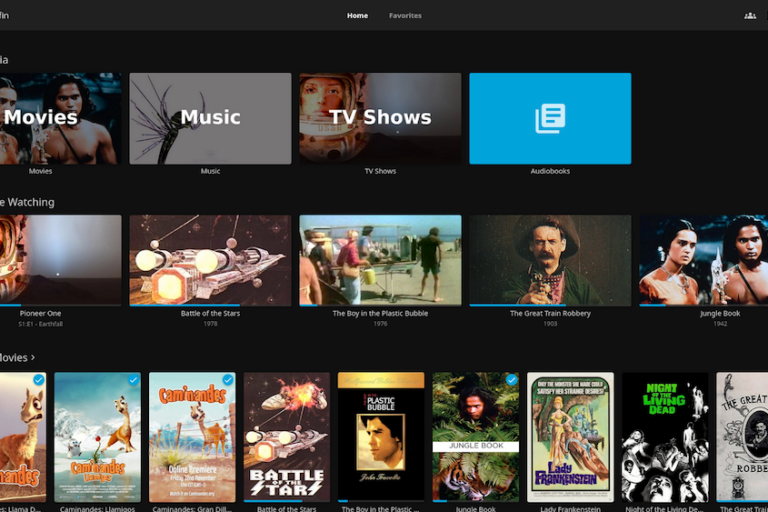
- Applications: services such as Jellyfin for media, Nextcloud for file collaboration, or Immich for photos.
- Access: the network connections and authentication that let devices reach those services.
You can change one layer without replacing everything. For example, a basic shared folder can become the storage source for a media server later. Keeping these layers distinct also makes recovery easier.
Choose what stays in the cloud
“Ditching the cloud” does not have to mean eliminating every external service. An encrypted off-site backup, hosted email, or managed domain registration may still be sensible. Self-hosting email, in particular, adds deliverability and abuse-management problems unrelated to storing your media.
Start with services that offer a clear benefit: large media libraries, private file storage, and local computer backups. Keep existing services until their replacements have survived a real restore test and several weeks of ordinary use.
Your main risks are usually disk failure, accidental deletion, stolen credentials, ransomware, and exposed software—not an exotic attacker. A secure design addresses all of them. Encryption helps with stolen hardware; backups help with deletion; restricted network access reduces exposure. No single setting solves every problem.
Plan the Server Around Your Actual Workload
Before buying hardware, record your current data size, expected growth, number of users, and essential applications. Note whether access must work outside your home and how long you could tolerate an outage.
For media, distinguish direct play from transcoding. Direct play sends a compatible file to the client with little processing. Transcoding converts video, audio, or subtitles in real time and can demand substantially more computing power. A device that streams files effortlessly may struggle when several users request conversions simultaneously.
Choose between a NAS, mini PC, and conventional server
- Commercial NAS: convenient drive bays and an integrated interface. Check application support, security-update history, expansion options, and hardware-transcoding capabilities before buying.
- Mini PC: compact and often efficient. Well suited to applications, but internal storage expansion may be limited.
- Desktop or tower server: flexible drive capacity and cooling, with potentially higher power consumption and noise.
- Retired enterprise hardware: attractive purchase prices, but sometimes expensive to run and difficult to quiet.
A modern system with 8–16 GB of RAM is a practical starting point for several modest services, though photo indexing, virtual machines, and larger workloads may need more. Choose a supported integrated GPU if hardware video transcoding matters; confirm compatibility with your application and operating system.
Budget for the supporting equipment
Include backup drives, network cables, replacement disks, and electricity—not just the computer. Annual energy use in kilowatt-hours equals average watts multiplied by 8,760, divided by 1,000. Multiply that result by your electricity rate.
Use wired Ethernet for the server where possible. Gigabit Ethernet is adequate for many homes; faster networking matters most when moving large files between devices that also support it. A UPS can allow graceful shutdown during outages, provided the server is configured to receive its shutdown signal.
Separate the operating system from valuable data
Install the operating system and applications on an SSD, and place bulk media or documents on dedicated storage. This is not mandatory, but it simplifies upgrades and replacement. Keep application configuration and databases in clearly identified locations that your backup process includes.
Use predictable folders such as media, documents, photos, application-data, and backups. Document mount points and disk identifiers. On Linux, mounting by filesystem UUID or another stable identifier avoids relying on device names that can change after reboot.
Understand mirrors, parity, and filesystems
A mirror stores copies across disks and can keep working after a supported disk failure. Parity-based arrays offer different capacity and failure-tolerance trade-offs. Neither protects you from deleting a folder, ransomware encrypting files, or a fire destroying the server.
ZFS combines storage management, checksums, snapshots, and other capabilities. With suitable redundancy, it can repair some detected corruption. Traditional Linux filesystems such as ext4 are also sensible choices for simpler arrangements. Choose a layout you understand, and check its expansion rules before committing disks: adding capacity is not equally straightforward for every configuration.
Leave free space for normal operation, snapshots, and growth. Avoid planning an array that will be nearly full on day one.
Use snapshots without mistaking them for backups
Snapshots preserve earlier filesystem states and make accidental changes easier to reverse. They are particularly useful before upgrades and for frequently edited documents. However, snapshots stored on the same machine share many of its risks.
Schedule disk-health checks and, where supported, filesystem scrubs. SMART warnings can identify some problems, but a clean report does not guarantee a healthy disk. Keep important data backed up before replacing drives or changing an array layout.
Choose an operating system deliberately
Ubuntu Server or Debian works well for a general-purpose Linux server. A storage-oriented platform such as TrueNAS may be preferable when storage administration is the main priority. Commercial NAS software offers another route, usually with tighter hardware integration and fewer low-level decisions.
Use a currently supported release and official installation images. Avoid choosing an operating system solely because a tutorial uses it; you will need to understand its update process, storage model, and recovery options.
Establish a secure baseline first
- Install updates and create a normal administrative account rather than routinely working as root.
- Give the server a stable local address, usually through a DHCP reservation on your router.
- Configure the host firewall to permit only required traffic from appropriate networks.
- If using SSH, configure key-based authentication, test it, and then disable unnecessary password access and direct root login.
- Set the correct time zone and enable time synchronization so logs and scheduled jobs behave predictably.
- Record the server’s address, storage layout, and recovery procedure.
Keep a working administrative session open while changing remote-access settings, so a mistake does not immediately lock you out.
Use containers for repeatable applications
Containers make application installation and upgrades more reproducible. Docker Compose is a common way to describe related services, their storage, and their networks in a versioned configuration.
Containers are not a complete security boundary. Avoid privileged mode, unnecessary host-directory mounts, and exposing the Docker socket to applications. Publish only required ports, and verify access from another device: container networking can interact unexpectedly with host-firewall rules.
Store persistent data outside disposable container layers. Choose explicit application versions rather than blindly following a moving “latest” tag, and keep passwords out of public configuration repositories. Back up deployment files alongside application data.
Choose the player ecosystem
Jellyfin offers an open-source media server without a required subscription. Plex and Emby provide alternative ecosystems, with some features tied to paid plans or external accounts. Compare the clients available for your televisions, phones, tablets, and streaming devices.
Test a representative sample before committing: a high-bitrate movie, a subtitled episode, music, and any formats you use regularly. Client compatibility often matters more than raw server performance. Use media you own or are authorized to access and distribute.
Organize files for reliable identification
Keep movies and television in separate libraries. Use consistent names containing the title and year for movies, and season and episode identifiers for television. For example, a movie folder named “Example Film (2024)” is easier to identify than an unexplained filename.
Give the media application read-only access to the library unless it genuinely needs to modify files. Keep downloaded artwork, metadata, and application databases separate where the software supports it. This reduces the damage a compromised service or mistaken setting can cause.
Diagnose playback before upgrading hardware
If playback stutters, check whether the server is direct-playing, remuxing, or transcoding. Inspect network throughput, CPU use, and the application’s playback diagnostics. Subtitles that must be burned into video can trigger an otherwise unnecessary transcode.
Remote streaming also depends on your home’s upload bandwidth and the viewer’s connection. Hardware acceleration can help, but it requires compatible hardware, drivers, and application configuration. Test the actual formats you use; codec, bit depth, and HDR handling all affect compatibility.
Use shared folders for straightforward local access
SMB shares are a practical choice for files accessed by Windows, macOS, and Linux devices on your home network. Create individual accounts and grant access by folder or group. Avoid a single shared administrator login.
Separate private documents from household media and guest-accessible folders. Check permissions from a non-administrative account; a share that appears restricted in its interface may still have overly broad filesystem permissions underneath. Never expose SMB directly to the internet.
Add synchronization and photo applications selectively
Nextcloud can provide browser access, synchronization, sharing, and collaboration. Syncthing focuses on synchronization between devices rather than recreating a hosted document portal. Immich provides a photo-oriented experience with mobile uploads and search features.
Each introduces its own database, upgrade requirements, and recovery procedure. Start with one application instead of installing a whole catalog. For photos, verify that originals, metadata, and the application database are protected, and check what happens when a phone deletes an uploaded image.
Synchronization is not backup. A deletion or corrupted file may synchronize perfectly to every connected device. Version history helps, but independent backups remain necessary.
Keep endpoint backups separate from ordinary shares
Your laptop and desktop backups should use dedicated backup software and storage appropriate to each operating system. Check current compatibility before configuring a network destination, particularly for Time Machine.
Where practical, prevent everyday user accounts from deleting every backup generation. The server also needs its own backup: storing a laptop’s backup on the server does not protect the server’s documents, media, or application databases.
Start with private network access
For personal or household use, a VPN is usually the simplest secure approach. WireGuard provides a lightweight VPN, while mesh-VPN tools such as Tailscale simplify connectivity between devices and can help with difficult network arrangements.
Managed mesh services may introduce dependence on an external control plane or identity provider. That can be a reasonable trade-off, but it is still a dependency. Protect the associated account, restrict which devices can reach administrative services, and remove lost or unused devices promptly.
Understand port forwarding, CGNAT, and IPv6
Traditional inbound access often requires a public IP address and a router port-forwarding rule. If your ISP uses carrier-grade NAT, ordinary IPv4 port forwarding may not work. Options include asking for a public address, using a suitable VPN, or using a tunnel service.
IPv6 changes the picture: devices may have globally routable addresses without IPv4-style forwarding. Router and host firewall rules still need to block unsolicited access. Do not assume that “I forwarded no ports” means a service is unreachable.
Dynamic DNS tracks a changing public address; it does not bypass CGNAT or provide security.
Publish only services that genuinely need public access
If people cannot use your VPN, publish selected web applications through a maintained reverse proxy with HTTPS. Use a domain you control, automatic certificate renewal, and the application’s documented proxy settings.
HTTPS protects traffic in transit; it does not fix vulnerable software or weak authentication. Enable multifactor authentication where supported, disable open registration unless needed, and keep administrative dashboards, databases, SSH, and storage protocols private.
Third-party tunnels may terminate encryption or impose usage restrictions, depending on their design. Review privacy implications and terms before routing sensitive files or high-volume media through them.
Build independent copies with version history
A useful starting point is the 3-2-1 principle: three copies of important data, across two storage types or independent storage systems, with one copy off-site. The point is to avoid shared failure modes, not merely satisfy a count.
A practical home arrangement is primary server storage, a versioned backup to a separate device, and an encrypted off-site copy. An external drive rotated away from home can work; so can remote storage. Tools such as restic or Borg provide encrypted, versioned backups.
Protect irreplaceable photos and documents first. Replaceable media may justify a different retention policy if backing up everything exceeds your budget.
Back up applications consistently
Copying a running database’s files may produce an unusable backup. Use the application’s documented procedure, a database dump, or a coordinated shutdown or snapshot method that preserves consistency.
Include uploaded files, databases, configuration, encryption keys, and recovery instructions. Keep backup passwords and essential keys somewhere accessible if the server fails, such as a password manager with an independent recovery method. An encrypted backup is useless if its only key was on the failed disk.
Limit the server’s ability to destroy all historical backups. Offline copies, appropriately configured immutable storage, and separate backup credentials can reduce ransomware damage.
Test restoration—not just backup completion
Restore a document and a photo to a temporary location, then test a complete application recovery. Confirm that files open, permissions are sensible, and users can sign in. Repeat after major changes.
Decide your acceptable data-loss window and recovery time. Nightly backups may mean losing up to a day of changes; recovering a large media library may take much longer than restoring essential documents. Write down which services come back first and what equipment you would need.
Monitor failures before users discover them
Track free space, disk health, backup results, temperatures, and service availability. Alerts should reach a destination outside the server so you can receive them when it is offline. Configure notifications for failed backups and low storage, then test that they arrive.
A successful status message is not enough: check when the last backup ran, what it included, and whether its destination remains healthy. Review logs when investigating problems, but avoid collecting sensitive information unnecessarily.
Update deliberately and keep a recovery path
Apply security updates promptly. Routine operating-system patches can often be automated; application upgrades deserve extra care when they change databases or configuration. Read release notes, make a consistent backup, and update one service at a time.
Do not assume downgrading a container reverses a database migration. A genuine rollback may require restoring the previous database and application data. Keep deployment configuration under version control without including secrets, and note the versions associated with backups.
Periodically review accounts, exposed ports, abandoned applications, and router settings. Removing an unused service is often more effective than trying to harden it indefinitely.
Final Verdict
Self-hosting is more than just an alternative to cloud services—it’s a way to take control of your digital life, protect your privacy, and build a personalized infrastructure for your media, files, and applications. By turning your own PC or home server into a media and data hub, you can stream your favorite content, access files across devices, automate backups, and reduce your dependence on third-party platforms and recurring subscription fees. With tools like Jellyfin, Nextcloud, and Docker, getting started with self-hosting is more accessible than ever, even for beginners. While it requires some initial setup, ongoing maintenance, and attention to security, the flexibility and control you gain can make the effort worthwhile. Start with a simple service, learn as you go, and gradually expand your setup into a powerful home server that puts your data and digital services back in your hands.