
You ran a speed audit on PageSpeed Insights or GTmetrix, and the results were frustrating. Maybe your Time to First Byte (TTFB) spiked for overseas visitors, or image-heavy pages took five seconds to load on mobile connections. Or perhaps you checked your monthly cloud hosting bill from Amazon AWS, Google Cloud, or an enterprise CDN add-on and realized you were paying exorbitant fees just to push static JPEG and CSS files through the wire.
A Content Delivery Network (CDN) fixes this bottleneck by storing copies of your static files—images, scripts, stylesheets, fonts, and videos—across a worldwide network of edge servers. When a visitor in Sydney loads a site hosted on a server in Frankfurt, they don’t wait for data to travel halfway around the planet. An edge server a few miles from their location delivers those heavy assets almost instantly.
bunny.net has become a top choice for webmasters, developers, and site owners who want raw speed without enterprise pricing. With points of presence (PoPs) distributed across six continents, low network latency, and bandwidth costs that start at fractions of a cent per gigabyte, it delivers top-tier performance while slashing the load on your origin server.
Step 1: Account Creation and Dashboard
Getting started with bunny.net takes less than two minutes. Head to their registration page, enter your email address, and choose a password. New accounts receive a 14-day free trial with test credit to evaluate performance before committing any funds, Create your bunny.net account now.
bunny.net operates on a transparent, pay-as-you-go model. You deposit a small credit balance (for example, $10), and your bandwidth consumption deducts from that pool in real time. The only baseline requirement is a nominal $1/month minimum fee to keep your account active, even on tiny personal projects.
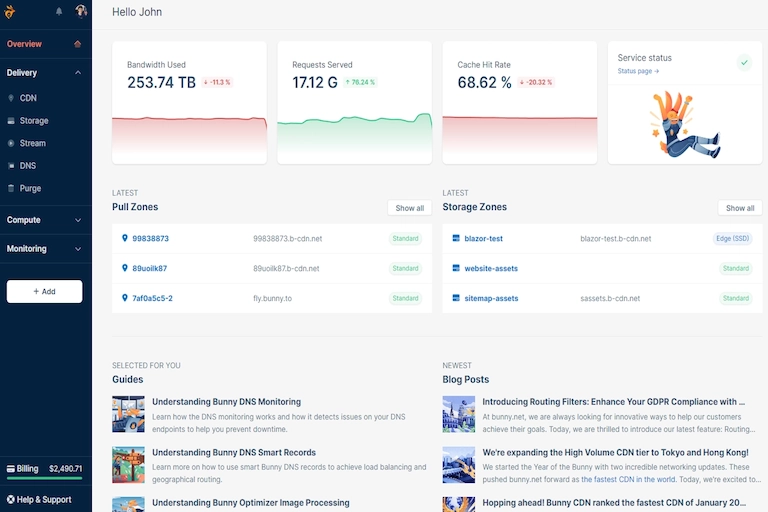
Once logged in, the minimalist control panel avoids the clutter common to legacy cloud providers. You will spend most of your time across three main sections:
- Pull Zones: The heart of the CDN. This is where you configure how bunny.net fetches, caches, optimizes, and delivers files from your website.
- DNS: Bunny DNS is a high-speed, geo-routed Anycast DNS management system with instant propagation. (Optional, but handy if you prefer unified management.)
- Storage: Bunny Storage provides globally replicated object storage buckets where you can upload static assets, backups, or media directly without running a traditional web server.
To prevent service interruptions, navigate to Billing, add your payment method, and configure an automatic recharge rule. For instance, you can instruct the system to recharge $10 whenever your account balance drops below $3. This guarantees that your CDN never stops serving images during an unexpected viral traffic surge.
Step 2: How to Create Your First Pull Zone
A Pull Zone acts as an automated mirror of your website. You do not need to manually upload your images or CSS files. When a user requests a file through your Pull Zone URL, bunny.net automatically “pulls” the original file from your origin server, caches it across its edge network, and serves future visitors directly from that cache.
- Click on Pull Zones in the left navigation and select Add Pull Zone.
- Name: Choose a zone name (for example,
mybrand-cdn). This generates your default CDN hostname:mybrand-cdn.b-cdn.net. - Origin URL: Enter the full web address of your existing website (e.g.,
https://yourdomain.com), including the properhttps://protocol. - Choose Your Tier: bunny.net offers two primary delivery network tiers:
- Standard Tier: Utilizes every global point of presence across North America, Europe, Asia, South America, Oceania, and Africa. Best for websites, e-commerce stores, and blogs where absolute speed and lowest latency are critical for all visitors.
- Volume Tier: Routes traffic through a curated subset of high-capacity data centers at discounted rates (starting around $0.005/GB). Ideal for large file downloads, video streaming libraries, and media archives.
- Click Add Pull Zone to deploy your zone across the network within seconds.
Step 3: Connecting bunny.net to WordPress
Once your Pull Zone is active, you need to tell your website to route asset URLs through bunny.net instead of your local server.
Method A: Using the Official WordPress Plugin
If you run a WordPress site, integration takes less than three minutes:
- Log in to your WordPress dashboard, navigate to Plugins > Add New, and search for Bunny.net.
- Install and activate the official plugin.
- Open the plugin settings page and enter your Pull Zone name (e.g.,
mybrand-cdn). - Check the box to enable the CDN, choose which directories to rewrite (by default:
wp-contentandwp-includes), and save changes.
The plugin automatically scans your HTML output and rewrites image and script links from https://yourdomain.com/wp-content/uploads/photo.jpg to https://mybrand-cdn.b-cdn.net/wp-content/uploads/photo.jpg.
Method B: Manual Setup for Custom Websites and Other Platforms
For custom web applications (Node.js, Laravel, Django) or CMS platforms like Ghost, update your application’s asset URL configuration setting to point to your Pull Zone URL. Alternatively, you can use HTML template tags to prefix media links with your CDN hostname.
Setting Up a Custom CNAME (cdn.yourdomain.com)
Using a custom hostname maintains clean branding and keeps your asset URLs tied to your domain:
- Inside your Pull Zone dashboard, click Add Custom Hostname.
- Enter your desired subdomain (e.g.,
cdn.yourdomain.com). - Log in to your DNS provider (Cloudflare, Namecheap, Route 53, etc.) and add a new CNAME record:
- Name/Host:
cdn - Target/Value:
mybrand-cdn.b-cdn.net - TTL: Automatic or 300 seconds
- Name/Host:
Step 4: Enabling Free SSL and Performance Optimization
Serving assets securely over HTTPS is mandatory. Once your CNAME record has propagated, click the SSL lock icon next to your custom hostname in the bunny.net dashboard and select Enable Free Let’s Encrypt SSL. Within a few seconds, bunny.net automatically provisions, installs, and renews a dedicated certificate for your CDN subdomain at zero cost.
Recommended Edge Performance Toggles
Navigate to the Caching and Edge Rules sections in your Pull Zone settings to enable these core optimizations:
- Brotli Compression: Turn this on under Cache Settings. Brotli compresses text-based assets (CSS, JS, SVG, HTML) significantly better than standard Gzip, saving 15–20% on payload sizes.
- Bunny Optimizer (Optional Add-on): Automatically converts images to WebP/AVIF on the fly, strips unnecessary metadata, and minifies HTML, CSS, and JavaScript.
- Browser Cache Expiration: Set this to at least 1 month or 1 year for static assets with version hashes. Long browser caching times eliminate repeated requests for returning visitors.
- Disable Cookie Caching: Ensure cookies are ignored for static file requests so edge caches can serve identical images to all users without cache misses.
[color_note type=”pro-tip”]Ensure your origin server sends a proper Cache-Control header (such as public, max-age=31536000, immutable) for static assets. Bunny honors these headers by default, ensuring your content stays warm in the edge cache.[/color_note]
Step 5: Testing Setup and Adding Basic Security
Before launching your configuration to all visitors, verify that files are serving properly from the edge network.
Open your website in a browser, open Developer Tools (F12), and switch to the Network tab. Filter by Img or CSS and reload the page. Click on any asset that has been rewritten to your CDN hostname and inspect the response headers:
server: BunnyCDNconfirms the request hit the bunny.net network.cdn-cache: HITindicates the file was served directly from the edge cache without pinging your origin server. (The first visit will showMISSwhile the edge fetches it).content-encoding: brconfirms Brotli compression is active.
Protecting Your Bandwidth and Assets
Head to the Security tab in your Pull Zone dashboard to enable baseline protections:
- Block Hotlinking: Prevent other websites from embedding your images directly on their pages and draining your CDN credits. Add your own domain to the allowed referrers list.
- Block Root Path Access: Prevent visitors from viewing a raw file directory if they navigate to your root CDN URL (
cdn.yourdomain.com/). - Geo-blocking: Block regions where you do not operate to mitigate scrapers and bot traffic.
Finally, locate the Purge Cache button at the top right of your Pull Zone dashboard. Whenever you deploy a critical CSS rewrite or update an existing logo file without changing its filename, use this tool to instantly clear the global edge cache across all worldwide locations. Check bunny.net to experience all these features now.